

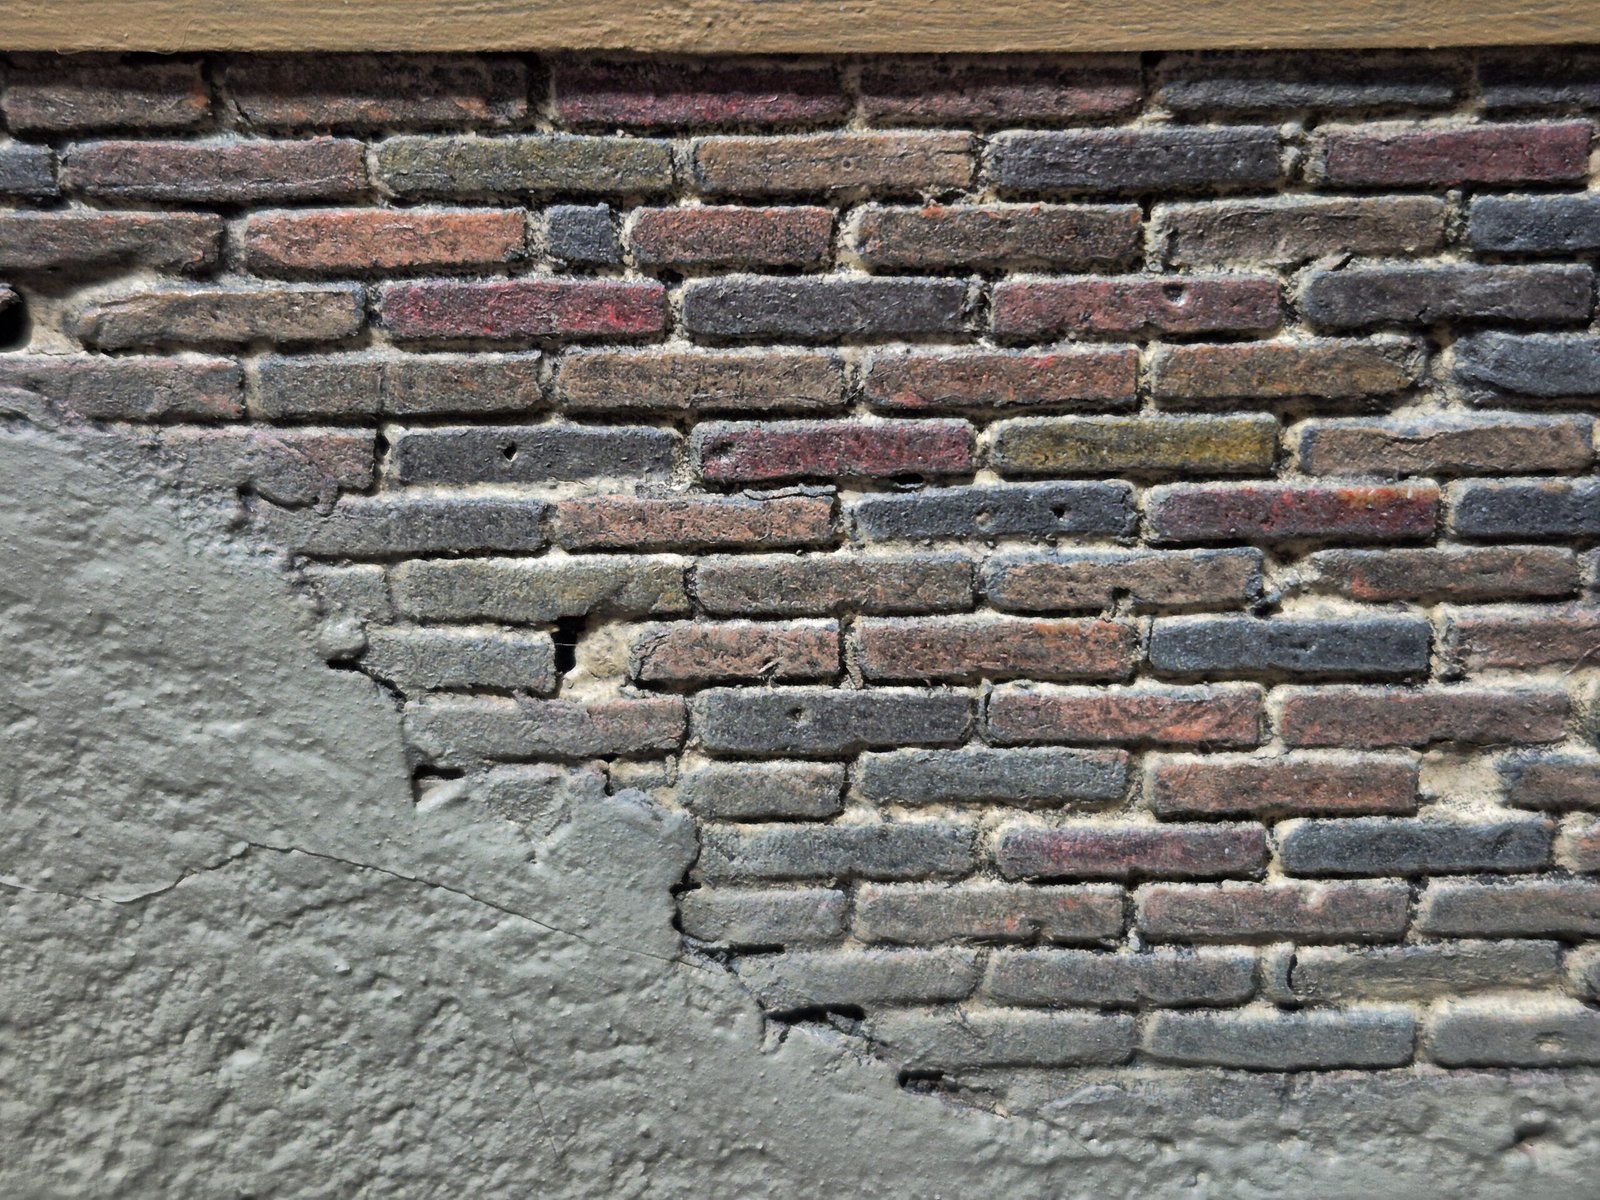
Learn how to create convincing European brick walls with natural color variation, realistic mortar, and simple weathering techniques.
One of my favorite parts of building WWII dioramas is creating the buildings. Old European houses, damaged factories, ruined streets — they all help tell the story.
But there’s one thing that can completely ruin the illusion: a brick wall that looks like a bright red plastic toy!
Real brick walls aren’t made of perfectly identical red bricks. Especially when we’re recreating buildings that have been standing for decades and survived the harsh conditions of World War II.
The good news? You don’t need 25 different layers of paint to make your bricks look realistic.
Today, I’m sharing a simple technique for painting realistic brick walls for your next scale-model diorama.le.
Why Real European Bricks Aren’t All Red
Take a close look at an old European brick building.
You’ll notice that the bricks have different shades, including:
- Dark reddish-brown
- Burnt orange
- Muted brown
- Grey and charcoal
- Faded tan and earthy tones
These differences come from the original clay, firing conditions, age, dirt, and exposure to the elements.
When we recreate these subtle variations on a scale model, the wall immediately starts looking more convincing.
The secret isn’t adding more paint. It’s putting the right colors in the right places.
Materials You’ll Need
You don’t need an entire paint collection for this technique.
Start with a selection of acrylic colors and weathering products:
- Dark base color, such as German Black
- Muted grey-blue and deck tan
- Earthy red, brown, and yellow tones
- Grey and brown washes
- Fine paintbrushes
- A prepared miniature brick wall
You can adjust the colors depending on the building you’re recreating. A factory in Berlin won’t necessarily have the same brick colors as a farmhouse in Normandy.
Step 1 — Start With a Dark Base
Begin by covering the wall with a dark base coat.
This gives you a foundation for the brick colors and helps create natural depth between the bricks.
Make sure the paint reaches the recessed mortar joints.
Don’t worry if the wall looks too dark at this stage. We’re going to bring those bricks to life.
Step 2 — Paint Individual Bricks With Different Colors
Here’s where the magic happens!
Instead of painting every brick the same shade, choose a few complementary colors and apply them randomly to individual bricks.
Work with muted reds, browns, oranges, and greys.
Keep the distribution irregular. Avoid creating obvious repeating patterns.
Some bricks can remain darker, while others receive a slightly lighter or warmer color.
Step 3 — Create Natural Mortar Lines
Mortar is just as important as the bricks themselves.
For an aged European building, avoid making every mortar joint pure white. A subdued grey or dusty beige usually creates a more natural appearance.
Apply the mortar color carefully so it settles into the recessed joints without completely covering the brick faces.
If the mortar looks too clean, don’t worry. The next stage will help tie everything together.
Step 4 — Weather the Wall
Now it’s time to get dirty!
Use controlled washes to add age and depth to the brickwork.
A grey wash can help unify the colors, while a brown wash adds dirt and grime.
Focus additional weathering around areas where moisture and dust would naturally collect:
- Near the bottom of the wall
- Under windowsills
- Around damaged masonry
- Along cracks and recessed details
The goal is to make the wall look like it’s been exposed to the elements for years, not freshly built yesterday.
Step 5 — Add the Finishing Touches
Once everything is dry, take another look at the wall.
Are some bricks too bright? Tone them down.
Does everything look too uniform? Add a few subtle color variations.
Are the mortar lines too clean? Apply a little extra weathering.
Remember that less is often more. A convincing brick wall should look natural when viewed as part of the complete diorama.
Watch the Full Video Tutorial
Want to see the painting process in action?
Watch my Scale Wonderland tutorial:
Realistic WWII Brick Walls for Dioramas Without Extra Layers
In the video, I demonstrate how to create natural brick colors, paint mortar, and weather the finished wall without relying on endless paint layers.
Bring Your WWII Dioramas to Life
Whether you’re recreating a ruined street in Berlin, a French village in Normandy, or an abandoned industrial building, realistic brickwork can make a huge difference.
And that’s what I love about scratch-building and scale modeling: turning simple materials into something that tells a story.
For more painting and weathering techniques, check out my free Weathering Techniques for Realistic Military Models guide.
You can also join the Scale Wonderland community on Patreon for more tutorials, workshop tips, and downloadable resources.
Until next time, happy modeling, and LET’S GET DIRTY!
Every Model Tells a Story! — Scale Wonderland